A Decadent Twist on a Classic Treat
There’s something magical about red velvet. The vibrant crimson color, the subtle hints of cocoa, and that soft, tender crumb—it’s no wonder red velvet cake has become a symbol of celebration, romance, and Southern tradition. But when red velvet meets the rich, fudgy world of brownies? That’s when something truly unforgettable is born.
Red velvet brownies are the ultimate dessert mashup. They combine the dense, chewy texture of a brownie with the elegance and flavor profile of red velvet cake. In our home, these brownies became a Valentine’s Day tradition—baked in heart-shaped molds and topped with swirls of cream cheese frosting. But they’re just as fitting for a holiday cookie exchange, a cozy winter night in, or a birthday tray that calls for something a little more festive.

This recipe brings that nostalgic red velvet flavor in brownie form, with a rich chocolate base, a subtle tang, and that signature velvety red hue. Each bite is dense yet tender, and if you’re a fan of pairing bold colors with bold flavors, these red velvet brownies are going to win your heart.

Why You’ll Love This Recipe:
- Fudgy & Rich: Perfectly chewy with a moist, dense center.
- Festive: The red color makes them ideal for holidays and special occasions.
- Easy to Make: No mixer needed and ready in under an hour.
- Naturally Flavored: Just the right amount of cocoa for true red velvet flavor.
- Dairy-Free Option: Can be easily adapted for dietary preferences.

Red Velvet Brownies
- Yield: 9–12 brownies 1x
Description
There’s something magical about red velvet. The vibrant crimson color, the subtle hints of cocoa, and that soft, tender crumb—it’s no wonder red velvet cake has become a symbol of celebration, romance, and Southern tradition. But when red velvet meets the rich, fudgy world of brownies? That’s when something truly unforgettable is born.
Red velvet brownies are the ultimate dessert mashup. They combine the dense, chewy texture of a brownie with the elegance and flavor profile of red velvet cake. In our home, these brownies became a Valentine’s Day tradition—baked in heart-shaped molds and topped with swirls of cream cheese frosting. But they’re just as fitting for a holiday cookie exchange, a cozy winter night in, or a birthday tray that calls for something a little more festive.
Ingredients
-
- ½ cup butter or dairy-free butter, melted
-
- 1 cup granulated sugar
-
- 2 large eggs
-
- 1 teaspoon vanilla extract
-
- 1 tablespoon red food coloring (liquid or gel)
-
- 1 tablespoon cocoa powder (unsweetened)
-
- ¼ teaspoon salt
-
- ¾ cup all-purpose flour
-
- Optional: ½ cup dairy-free chocolate chips or regular chocolate chips
Instructions
Preheat your oven to 350°F (175°C). Line an 8×8-inch baking dish with parchment paper or lightly grease it with cooking spray. This helps ensure easy removal later.
In a large mixing bowl, whisk together the melted butter and sugar until the mixture looks smooth and glossy. This step gives your red velvet brownies that shiny, crackly top everyone loves.
Add in the eggs, vanilla extract, and red food coloring. Stir until fully combined. The mixture should turn a deep red color—rich and vibrant. Add more food coloring if you’d like a stronger hue.
Now, sift in the cocoa powder and salt, followed by the flour. Gently fold the dry ingredients into the wet ingredients until just combined. Be careful not to overmix; you want to preserve that perfect chewy texture.
At this point, you can fold in chocolate chips for added richness, or leave them out if you prefer a classic version. The chips melt slightly into the batter, adding delicious bursts of chocolate in each bite.
Pour the batter into the prepared pan and use a spatula to smooth the top. Bake for 25–30 minutes, or until a toothpick inserted into the center comes out with a few moist crumbs. The top should be slightly cracked, and the edges firm.
Allow the brownies to cool completely in the pan before slicing. For clean edges, chill the brownies for 30 minutes in the fridge before cutting.
Notes
These brownies are best enjoyed at room temperature or slightly chilled. They firm up in the fridge, giving them that classic fudgy bite, but soften beautifully once they warm slightly.
Nutrition
- Calories: 210
Ingredients You’ll Need:
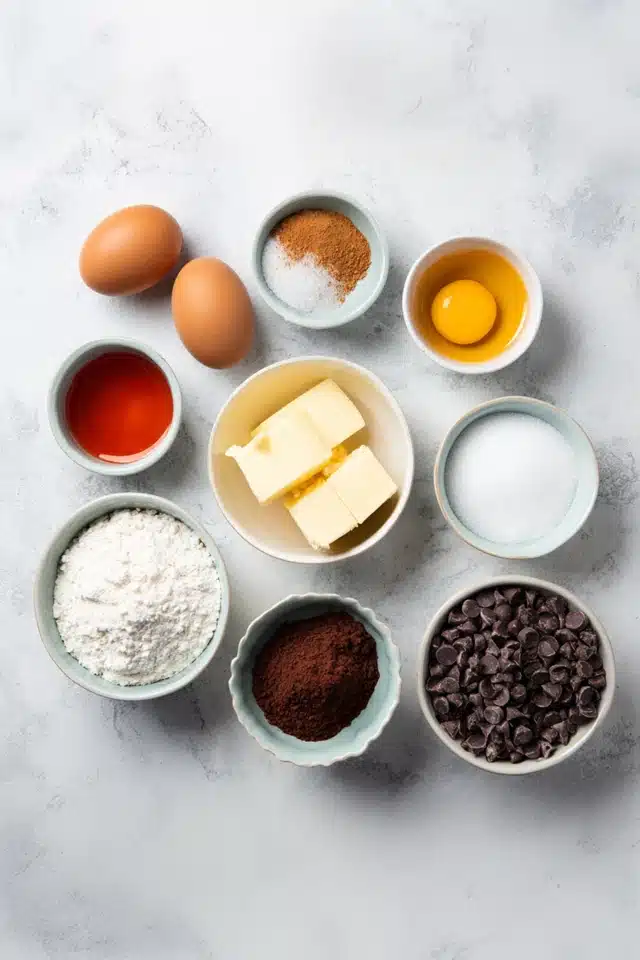
- ½ cup butter or dairy-free butter, melted
- 1 cup granulated sugar
- 2 large eggs
- 1 teaspoon vanilla extract
- 1 tablespoon red food coloring (liquid or gel)
- 1 tablespoon cocoa powder (unsweetened)
- ¼ teaspoon salt
- ¾ cup all-purpose flour
- Optional: ½ cup dairy-free chocolate chips or regular chocolate chips
How to Make Red Velvet Brownies

Step-by-Step Instructions:
Preheat your oven to 350°F (175°C). Line an 8×8-inch baking dish with parchment paper or lightly grease it with cooking spray. This helps ensure easy removal later.
In a large mixing bowl, whisk together the melted butter and sugar until the mixture looks smooth and glossy. This step gives your red velvet brownies that shiny, crackly top everyone loves.
Add in the eggs, vanilla extract, and red food coloring. Stir until fully combined. The mixture should turn a deep red color—rich and vibrant. Add more food coloring if you’d like a stronger hue.
Now, sift in the cocoa powder and salt, followed by the flour. Gently fold the dry ingredients into the wet ingredients until just combined. Be careful not to overmix; you want to preserve that perfect chewy texture.
At this point, you can fold in chocolate chips for added richness, or leave them out if you prefer a classic version. The chips melt slightly into the batter, adding delicious bursts of chocolate in each bite.
Pour the batter into the prepared pan and use a spatula to smooth the top. Bake for 25–30 minutes, or until a toothpick inserted into the center comes out with a few moist crumbs. The top should be slightly cracked, and the edges firm.
Allow the brownies to cool completely in the pan before slicing. For clean edges, chill the brownies for 30 minutes in the fridge before cutting.
Helpful Tips:

- Use gel food coloring for a bolder red tone without thinning the batter.
- Don’t overbake—the center should still be a little gooey when the timer goes off.
- Want a swirl? Add dollops of cream cheese on top before baking and swirl with a toothpick.
- Make it gluten-free: Use a 1:1 gluten-free flour blend for easy substitution.
- Dairy-free tip: Vegan butter and dairy-free chocolate chips work great in this recipe.
Details:
- Prep Time: 10 minutes
- Cook Time: 25–30 minutes
- Total Time: 40 minutes
- Yield: 9–12 brownies
- Category: Dessert
- Method: Baking
- Cuisine: American
- Diet: Vegetarian (dairy-free option included)
Notes:

These brownies are best enjoyed at room temperature or slightly chilled. They firm up in the fridge, giving them that classic fudgy bite, but soften beautifully once they warm slightly.
Nutritional Information (Per Brownie – Approximate):
- Calories: 210
- Carbohydrates: 28g
- Protein: 2g
- Fat: 10g
- Saturated Fat: 6g
- Sugar: 20g
- Fiber: 1g
- Sodium: 95mg
Frequently Asked Questions:
Can I use natural food coloring?
Yes, but the red may be more muted. Beet powder or natural food dyes can work in a pinch.
Do red velvet brownies taste like chocolate brownies?
They have a lighter cocoa flavor with a subtle tang from the vanilla and coloring, distinct from classic brownies.
Can I frost these?
Absolutely! Cream cheese frosting pairs beautifully or even a simple dusting of powdered sugar.
How long do they last?
They stay fresh for up to 5 days in an airtight container at room temperature or 1 week in the fridge.
Storage Instructions:
Store leftover red velvet brownies in an airtight container at room temperature for 3–4 days, or refrigerate for up to 1 week. You can also freeze them for up to 2 months—wrap individual pieces tightly for easy grab-and-go treats.
Related Recipes:

If you liked this recipe, you’ll definitely enjoy these other chocolate-packed favorites:
- Fudgy Chocolate Banana Bread – Rich and tender with a hint of fruit.
- Chewy Double Chocolate Cookies – A classic with twice the chocolate.
- Red Velvet Cupcakes with Cream Cheese Frosting – Another take on the red velvet craze.
Conclusion:
Red velvet brownies are more than just a pretty dessert—they’re a celebration in every bite. Whether you’re making them for a holiday, a birthday, or simply because you’re craving something sweet and comforting, this recipe delivers. Rich, chewy, and vibrantly red, these brownies are bound to become a favorite in your baking rotation.