When the weather is warm or your oven is full (or just off-limits), these No Bake Chocolate Oatmeal Bars come to the rescue. With a chewy texture, rich chocolate flavor, and just the right amount of sweetness, they feel indulgent while being surprisingly wholesome. For anyone who grew up with homemade fudge or oat treats lovingly cut into squares and wrapped in wax paper, these bars bring back sweet, sticky memories with every bite.

This recipe is one of those back-pocket favorites you’ll return to again and again. It uses ingredients you probably already have on hand—like oats, peanut butter, cocoa powder, and a bit of sweetener—and turns them into something utterly satisfying without ever touching the oven. Perfect for hot summer days, last-minute gatherings, or simply when you want a chocolate fix without the fuss.
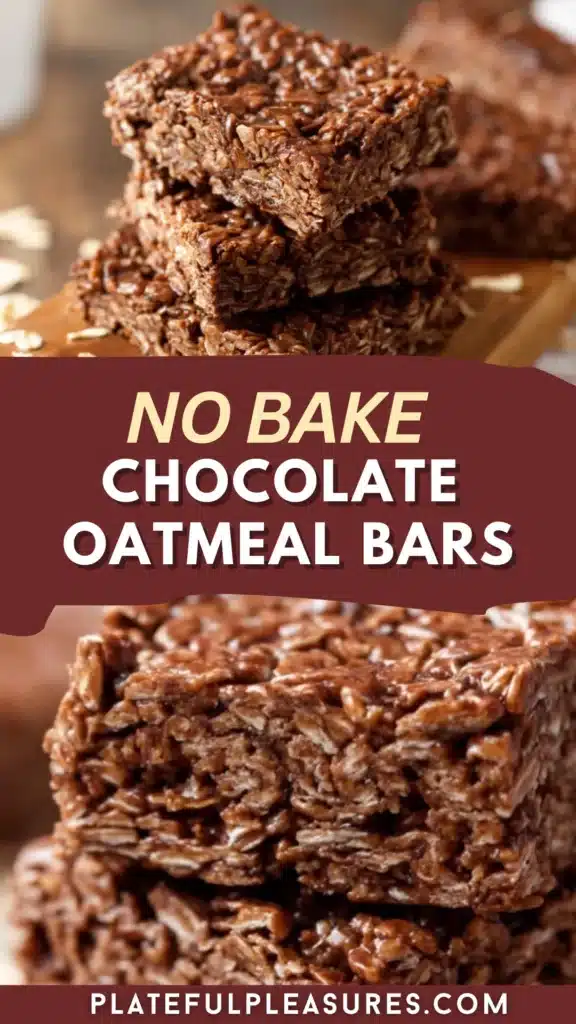
Whether you serve them at room temperature or chilled from the fridge, these bars deliver a hearty chew and a chocolatey richness that hits the spot. They’re ideal as a lunchbox treat, after-school snack, or quick dessert to share over coffee.
Let’s dive into how these easy No Bake Chocolate Oatmeal Bars come together.
Print
No Bake Chocolate Oatmeal Bars
- Yield: 16 small bars 1x
Description
When the weather is warm or your oven is full (or just off-limits), these No Bake Chocolate Oatmeal Bars come to the rescue. With a chewy texture, rich chocolate flavor, and just the right amount of sweetness, they feel indulgent while being surprisingly wholesome. For anyone who grew up with homemade fudge or oat treats lovingly cut into squares and wrapped in wax paper, these bars bring back sweet, sticky memories with every bite.
This recipe is one of those back-pocket favorites you’ll return to again and again. It uses ingredients you probably already have on hand—like oats, peanut butter, cocoa powder, and a bit of sweetener—and turns them into something utterly satisfying without ever touching the oven. Perfect for hot summer days, last-minute gatherings, or simply when you want a chocolate fix without the fuss.
Whether you serve them at room temperature or chilled from the fridge, these bars deliver a hearty chew and a chocolatey richness that hits the spot. They’re ideal as a lunchbox treat, after-school snack, or quick dessert to share over coffee.
Let’s dive into how these easy No Bake Chocolate Oatmeal Bars come together.
Ingredients
-
2 cups rolled oats
-
1/2 cup natural peanut butter (or almond butter)
-
1/3 cup maple syrup or honey
-
1/4 cup unsweetened cocoa powder
-
1/4 cup coconut oil (or butter)
-
1 teaspoon vanilla extract
-
1/4 teaspoon salt
-
1/2 cup dark chocolate chips (plus extra for topping, optional)
Instructions
Step 1: Line Your Pan
Start by lining an 8×8-inch or 9×9-inch square pan with parchment paper, leaving some overhang for easy lifting later.
Step 2: Melt the Wet Ingredients
In a medium saucepan over low heat, combine the coconut oil, peanut butter, maple syrup, cocoa powder, and salt. Stir gently as everything melts and blends together into a glossy, chocolatey mixture.
Step 3: Add Vanilla and Oats
Remove the pan from heat and stir in the vanilla extract. Then fold in the rolled oats until fully coated and combined.
Step 4: Add Chocolate Chips
Wait a couple of minutes before stirring in the chocolate chips so they don’t fully melt—this gives you nice chocolate chunks in the final bars. If you prefer them completely melted in, add them right away with the oats.
Step 5: Press and Chill
Transfer the mixture to your prepared pan. Use the back of a spoon or your hands (lightly greased or covered with parchment) to press the mixture firmly and evenly into the pan. Sprinkle extra chocolate chips on top if desired.
Step 6: Refrigerate
Place the pan in the fridge for at least 2 hours, or until firm. For quicker setting, place it in the freezer for 30–45 minutes.
Step 7: Slice and Serve
Once firm, lift the bars out using the parchment paper. Slice into squares or rectangles. Store in the fridge for a firm texture, or at room temperature for a softer, chewier bite.
Notes
-
These bars can be cut smaller for bite-sized treats or larger for hearty snacks.
-
Feel free to drizzle with melted chocolate for an extra fancy touch.
-
Bars can also be stored in the freezer for up to 2 months.
Nutrition
- Calories: 160 kcal
Why You’ll Love This Recipe:
- No oven required—great for summer or quick prep
- Just a handful of pantry ingredients
- Rich and chocolatey but not overly sweet
- Naturally gluten-free (with certified GF oats)
- Customizable with nuts, coconut, or dried fruit
INGREDIENTS YOU’LL NEED:
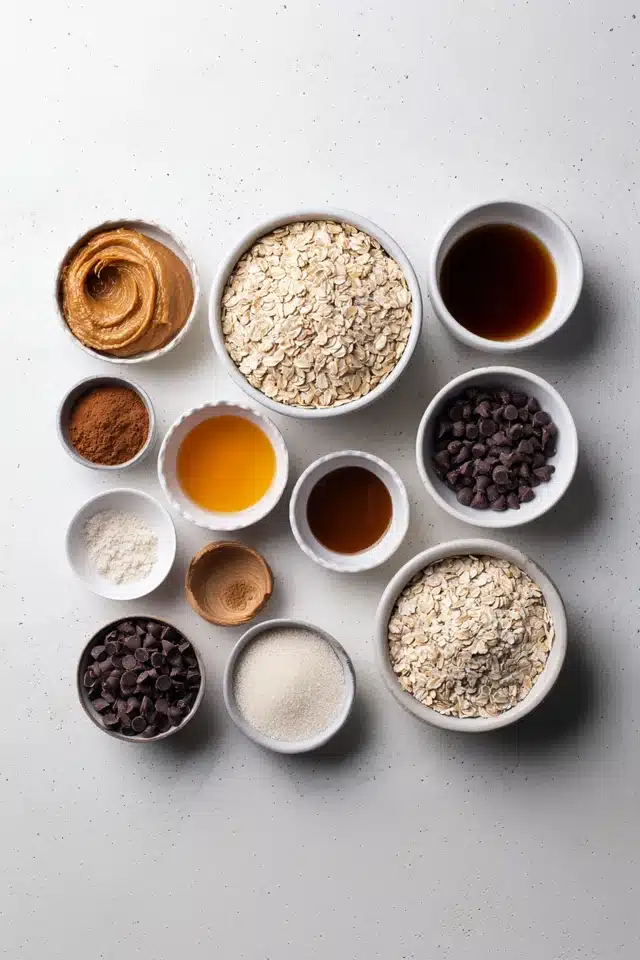
- 2 cups rolled oats
- 1/2 cup natural peanut butter (or almond butter)
- 1/3 cup maple syrup or honey
- 1/4 cup unsweetened cocoa powder
- 1/4 cup coconut oil (or butter)
- 1 teaspoon vanilla extract
- 1/4 teaspoon salt
- 1/2 cup dark chocolate chips (plus extra for topping, optional)
How to Make No Bake Chocolate Oatmeal Bars
You don’t need any fancy equipment—just a saucepan, a bowl, and a pan to press them into. The reward? A pan of soft, chocolatey bars you can slice and share… or keep all to yourself.
STEP-BY-STEP INSTRUCTIONS:

Step 1: Line Your Pan
Start by lining an 8×8-inch or 9×9-inch square pan with parchment paper, leaving some overhang for easy lifting later.
Step 2: Melt the Wet Ingredients
In a medium saucepan over low heat, combine the coconut oil, peanut butter, maple syrup, cocoa powder, and salt. Stir gently as everything melts and blends together into a glossy, chocolatey mixture.
Step 3: Add Vanilla and Oats
Remove the pan from heat and stir in the vanilla extract. Then fold in the rolled oats until fully coated and combined.
Step 4: Add Chocolate Chips
Wait a couple of minutes before stirring in the chocolate chips so they don’t fully melt—this gives you nice chocolate chunks in the final bars. If you prefer them completely melted in, add them right away with the oats.
Step 5: Press and Chill
Transfer the mixture to your prepared pan. Use the back of a spoon or your hands (lightly greased or covered with parchment) to press the mixture firmly and evenly into the pan. Sprinkle extra chocolate chips on top if desired.
Step 6: Refrigerate
Place the pan in the fridge for at least 2 hours, or until firm. For quicker setting, place it in the freezer for 30–45 minutes.
Step 7: Slice and Serve
Once firm, lift the bars out using the parchment paper. Slice into squares or rectangles. Store in the fridge for a firm texture, or at room temperature for a softer, chewier bite.
HELPFUL TIPS:

- Use natural peanut butter (the kind with just peanuts and salt) for the best texture and flavor.
- To make these nut-free, swap peanut butter for sunflower seed butter.
- Want more texture? Add chopped nuts, shredded coconut, or dried fruit.
- For a deeper chocolate flavor, use dark cocoa powder or add a pinch of espresso powder.
- Don’t skip the chilling step—this helps the bars firm up and hold their shape.
DETAILS:
- Prep Time: 10 minutes
- Chill Time: 2 hours
- Total Time: 2 hours 10 minutes
- Yield: 16 small bars
- Category: Snack / Dessert
- Method: No Bake
- Cuisine: American
- Diet: Vegetarian, Gluten-free (if using certified GF oats)
NOTES:

- These bars can be cut smaller for bite-sized treats or larger for hearty snacks.
- Feel free to drizzle with melted chocolate for an extra fancy touch.
- Bars can also be stored in the freezer for up to 2 months.
NUTRITIONAL INFORMATION:
(Per bar; approximate)
- Calories: 160
- Protein: 4g
- Carbohydrates: 15g
- Fat: 10g
- Sugar: 7g
- Fiber: 2g
FREQUENTLY ASKED QUESTIONS:
Can I use quick oats instead of rolled oats?
Yes, but the texture will be softer and less chewy.
Can I make these bars vegan?
Absolutely. Just use maple syrup and dairy-free chocolate chips.
Do these bars need to be refrigerated?
They’re best kept in the fridge for firmness, especially if your kitchen is warm.
How long do they last?
Stored in the fridge, they’ll stay fresh for up to 1 week. You can also freeze them for longer storage.
STORAGE INSTRUCTIONS:
Store the bars in an airtight container in the refrigerator for up to 1 week. For longer storage, freeze in a single layer or with parchment between layers in a freezer-safe bag or container. Thaw in the fridge or at room temperature before enjoying.
Related Recipes:

If you loved these bars, try these other no-bake favorites:
- https://www.platefulpleasures.com/healthier-no-bake-cheesecake-jar/
- https://www.platefulpleasures.com/cherry-cheesecake-stuffed-cookies/
- https://www.platefulpleasures.com/creamy-honey-cheesecake/
CONCLUSION:
These No Bake Chocolate Oatmeal Bars are a chocolate lover’s dream that comes together with ease. No oven, no complicated steps—just rich, chewy bars made with love (and a good amount of peanut butter). Keep them on hand for whenever your sweet tooth strikes or share them with friends and family for a treat that tastes like it took way more effort than it did.