A Festive Favorite That Melts in Your Mouth Like Winter Magic
Every family has that one cookie recipe that signals the start of the holiday season. For ours, it was always Mint Chocolate Chip Snowball Cookies. They’d appear like clockwork on the kitchen counter every December, dusted in powdered sugar like fresh snow, packed into tins for neighbors, and sneaked from the freezer late at night when no one was looking.

There’s a reason these cookies became such a beloved part of our winter traditions. They combine the cool, refreshing flavor of peppermint with the richness of chocolate chips, all wrapped in a buttery, melt-in-your-mouth cookie. Rolled twice in snowy powdered sugar, they look just as festive as they taste.
These cookies aren’t just about flavor—they’re about nostalgia. Whether you’re baking them with little ones, gifting a batch to a friend, or enjoying them with a cup of hot cocoa, they bring a sense of calm and cheer that only the best seasonal recipes do.

Why You’ll Love This Recipe:
- Festive & Pretty: Rolled in powdered sugar for a snowy, wintery look
- Cool Mint + Rich Chocolate: A flavor pairing that feels like a peppermint patty in cookie form
- No Chill Time: Mix, roll, and bake—no waiting required
- Perfect for Gifting: They keep well and look beautiful in cookie tins

Mint Chocolate Chip Snowball Cookies
- Yield: 24–28 cookies 1x
Description
A Festive Favorite That Melts in Your Mouth Like Winter Magic
Every family has that one cookie recipe that signals the start of the holiday season. For ours, it was always Mint Chocolate Chip Snowball Cookies. They’d appear like clockwork on the kitchen counter every December, dusted in powdered sugar like fresh snow, packed into tins for neighbors, and sneaked from the freezer late at night when no one was looking.
Ingredients
INGREDIENTS YOU’LL NEED:
-
1 cup unsalted butter, softened
-
1/2 cup powdered sugar (plus extra for rolling)
-
1 teaspoon peppermint extract
-
1/2 teaspoon vanilla extract
-
2 1/4 cups all-purpose flour
-
1/2 teaspoon salt
-
3/4 cup mini chocolate chips
-
3–5 drops green food coloring (optional)
Instructions
Step 1: Cream Butter and Sugar
In a large mixing bowl, beat the softened butter with 1/2 cup powdered sugar until light and fluffy—about 2–3 minutes. The mixture should be pale and creamy.
Step 2: Add Flavor and Color
Stir in the peppermint and vanilla extracts. If you’re using food coloring, add a few drops here. A soft pastel green adds a fun, festive touch—but it’s totally optional.
Step 3: Mix in the Dry Ingredients
Add the flour and salt. Mix on low speed or by hand until the dough starts to come together. It may look crumbly at first but will form a soft dough after mixing.
Step 4: Fold in Chocolate Chips
Gently stir in the mini chocolate chips until evenly distributed throughout the dough.
Step 5: Shape the Cookies
Use a tablespoon or small cookie scoop to portion the dough. Roll each portion into a ball and place on a parchment-lined baking sheet about 1 inch apart. The cookies won’t spread much.
Step 6: Bake Until Just Set
Bake at 350°F (175°C) for 10–12 minutes. The bottoms should be lightly golden, but the tops will remain pale. They should feel set but soft to the touch.
Step 7: Sugar Snowfall (Double Roll!)
Let the cookies cool on the pan for 5 minutes, then roll each one in powdered sugar while still warm. After they cool completely, roll them a second time to get that beautiful snowy coating.
Notes
- Make sure your butter is soft—not melted—for the right dough texture.
-
Store cookies with a piece of parchment between layers to prevent sticking.
-
These cookies also work well with chopped chocolate instead of chips if you want melty pockets.
Nutrition
- Calories: 130
INGREDIENTS YOU’LL NEED:
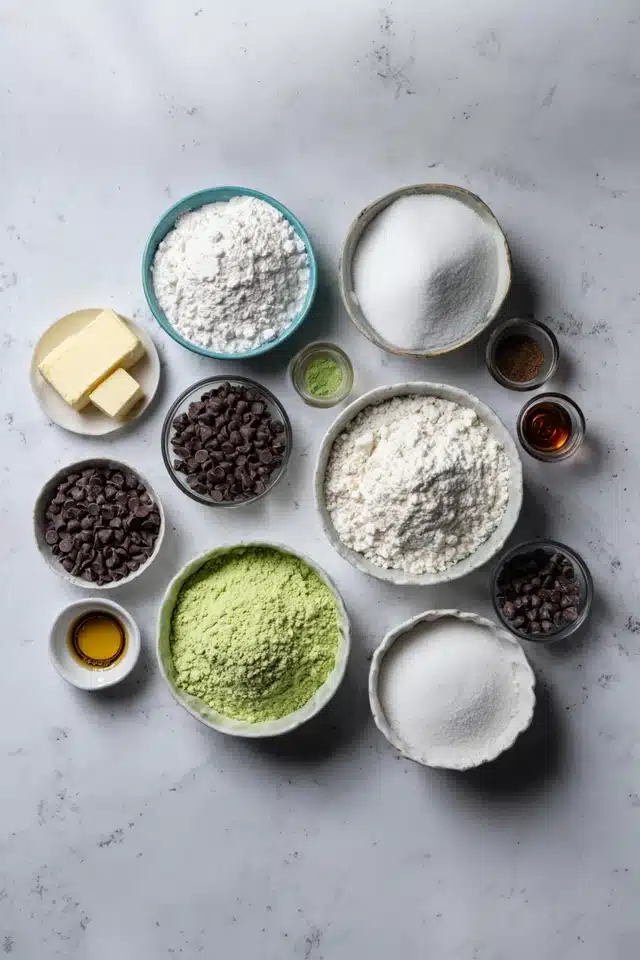
- 1 cup unsalted butter, softened
- 1/2 cup powdered sugar (plus extra for rolling)
- 1 teaspoon peppermint extract
- 1/2 teaspoon vanilla extract
- 2 1/4 cups all-purpose flour
- 1/2 teaspoon salt
- 3/4 cup mini chocolate chips
- 3–5 drops green food coloring (optional)
How to Make Mint Chocolate Chip Snowball Cookies
These Mint Chocolate Chip Snowball Cookies are incredibly simple to make. With one bowl and a handful of ingredients, you’ll have a batch of buttery, snowy treats ready in under 30 minutes.
STEP-BY-STEP INSTRUCTIONS:

Step 1: Cream Butter and Sugar
In a large mixing bowl, beat the softened butter with 1/2 cup powdered sugar until light and fluffy—about 2–3 minutes. The mixture should be pale and creamy.
Step 2: Add Flavor and Color
Stir in the peppermint and vanilla extracts. If you’re using food coloring, add a few drops here. A soft pastel green adds a fun, festive touch—but it’s totally optional.
Step 3: Mix in the Dry Ingredients
Add the flour and salt. Mix on low speed or by hand until the dough starts to come together. It may look crumbly at first but will form a soft dough after mixing.
Step 4: Fold in Chocolate Chips
Gently stir in the mini chocolate chips until evenly distributed throughout the dough.
Step 5: Shape the Cookies
Use a tablespoon or small cookie scoop to portion the dough. Roll each portion into a ball and place on a parchment-lined baking sheet about 1 inch apart. The cookies won’t spread much.
Step 6: Bake Until Just Set
Bake at 350°F (175°C) for 10–12 minutes. The bottoms should be lightly golden, but the tops will remain pale. They should feel set but soft to the touch.
Step 7: Sugar Snowfall (Double Roll!)
Let the cookies cool on the pan for 5 minutes, then roll each one in powdered sugar while still warm. After they cool completely, roll them a second time to get that beautiful snowy coating.
HELPFUL TIPS:

- Roll While Warm: The first roll in powdered sugar sticks best when the cookies are warm.
- Don’t Overbake: These are meant to be soft and tender, not crisp.
- Perfect for Freezing: Make ahead and freeze—just re-roll in powdered sugar after thawing.
- Customize Color: Skip the green food coloring for a classic white snowball, or add a few more drops for a bolder green.
DETAILS:
Prep Time: 15 minutes
Cook Time: 12 minutes
Total Time: 27 minutes
Yield: 24–28 cookies
Category: Dessert
Method: Baking
Cuisine: American
Diet: Vegetaria
NOTES

- Make sure your butter is soft—not melted—for the right dough texture.
- Store cookies with a piece of parchment between layers to prevent sticking.
- These cookies also work well with chopped chocolate instead of chips if you want melty pockets.
NUTRITIONAL INFORMATION (per cookie, approx):
- Calories: 130
- Fat: 7g
- Carbohydrates: 16g
- Sugar: 7g
- Protein: 1g
FREQUENTLY ASKED QUESTIONS:
Can I make these cookies ahead of time?
Yes! These cookies store beautifully. You can bake them ahead and store in an airtight container at room temperature for up to 5 days or freeze for up to a month.
Do I have to use food coloring?
Not at all. It’s purely decorative and doesn’t affect the taste. The cookies are just as delicious without it.
Can I make them gluten-free?
Yes, simply substitute the all-purpose flour with a 1:1 gluten-free flour blend.

STORAGE INSTRUCTIONS:
- Room Temperature: Store in an airtight container for up to 5 days.
- Refrigerator: Optional, but they’ll last up to 2 weeks chilled.
- Freezer: Freeze baked cookies for up to 1 month. Thaw and re-roll in powdered sugar before serving.
Related Recipes:
If you liked these Mint Chocolate Chip Snowball Cookies, you’ll definitely enjoy:
- Classic Snowball Cookies (without nuts) – Buttery and delicate with a simple vanilla flavor
- Chocolate Crinkle Cookies – Fudgy and festive with a crackled sugar coating
- Soft Peppermint Sugar Cookies – Sweet, minty, and perfect for decorating
- Andes Mint Chocolate Chip Cookies – For fans of mint chocolate in a chewier form
CONCLUSION:
Mint Chocolate Chip Snowball Cookies are the kind of dessert that instantly puts you in the holiday spirit. They’re easy to make, beautiful to serve, and filled with cozy flavors of peppermint and chocolate. Whether you’re baking for a cookie exchange, packing gift tins, or simply savoring the season with a warm drink in hand, these cookies are a must. Light, festive, and full of nostalgic charm—they’re the definition of holiday baking magic.